Adding Multiple Products
To add multiple products at one time, log in to your seller account by navigating to Footer > Become a Seller > Seller Dashboard.
Follow the steps to achieve bulk product addition:
- Go to Products → Products Tab
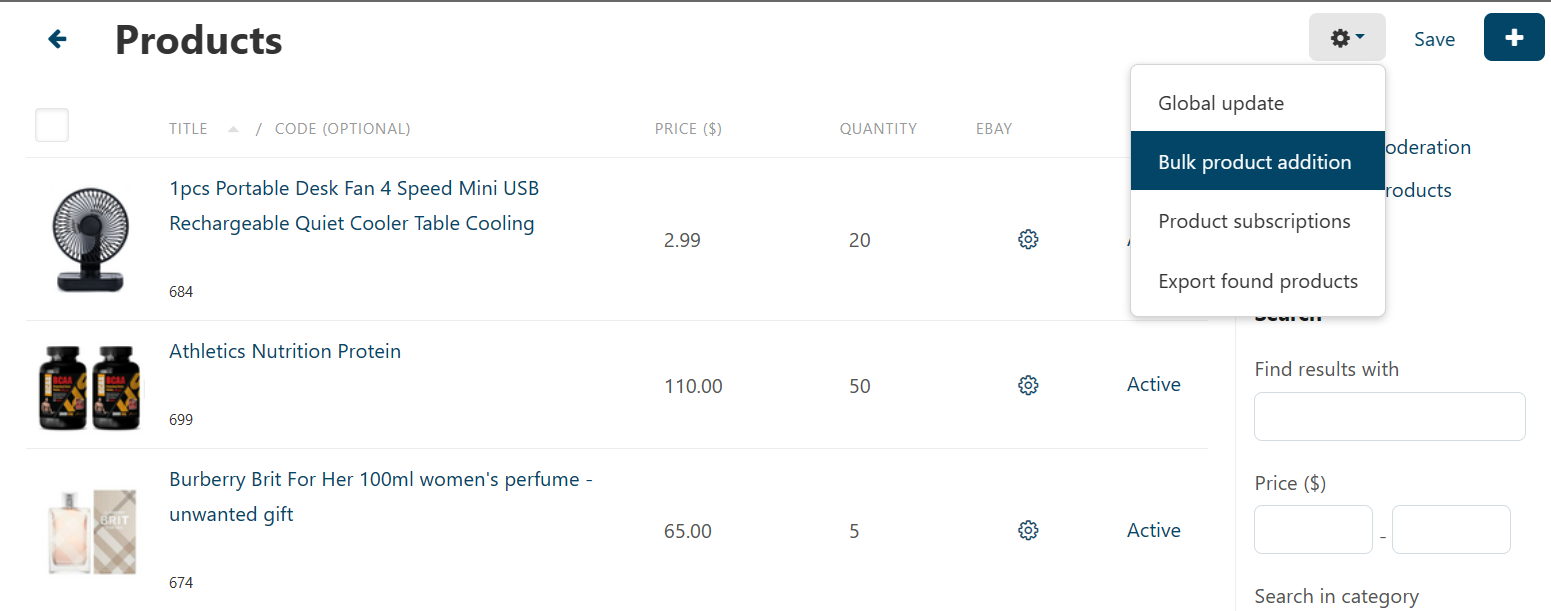
- Click the gear button in the upper right part of the page
- Choose Bulk product addition
- Add products and fill the empty fields
- Click create

There are options to add or clone, add is used to add as many products as you want to whereas clone is used to add products with at least one similarity such category, product name, sale price, list price, status.
Adding products from category section
You can also add products from category section. Log in to your seller account by navigating to Footer > Become a Seller > Seller Dashboard.
Follow the steps to add products:
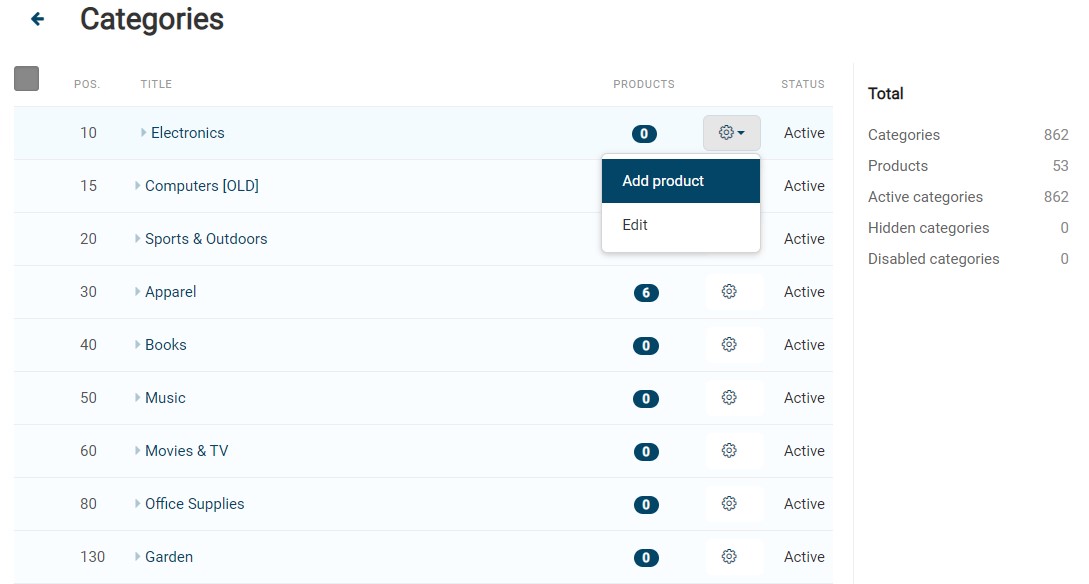
- Go to Products → Categories Tab
- Choose a category, you can dropdown to expand subcategories
- Click gear icon against the category
- Click add product
The page for creating the product will open. Configure the product's necessary properties. The product properties can be edited at any time in the future. You can learn more about configuring product details by checking Product Listing.
Import Products via CSV file
You can also import a list of products to the seller panel directly from CSV file. Follow the given steps:
Step1: Prepare Your CSV File
- Ensure your file follows the required column structure:
- Product Code (SKU)
- Category
- Product Name
- Stock Quantity
- Sale Price
- List Price
- Images URLs
- Other product details like Brand, Weight, Product Color, etc.
- Save the file in CSV (Comma-Separated Values) format.

Step2: Navigate to the Import Section
- Log in to your seller account by navigating to Footer > Become a Seller > Seller Dashboard.
- On the left menu, go to Products.
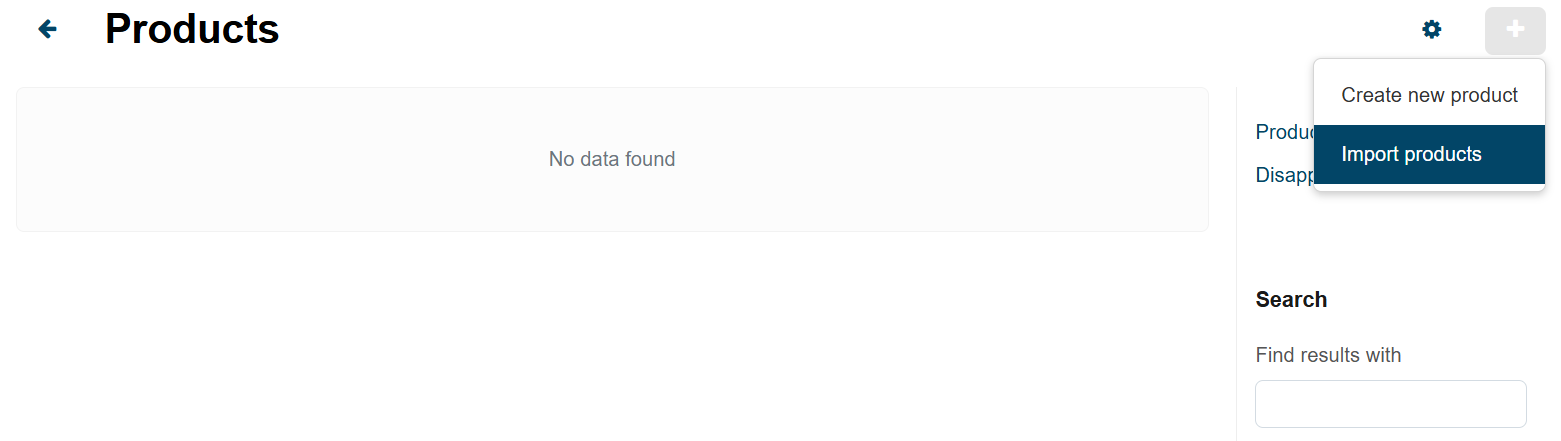
- Click on the “+” and select Import Products tab.
Upload the CSV File
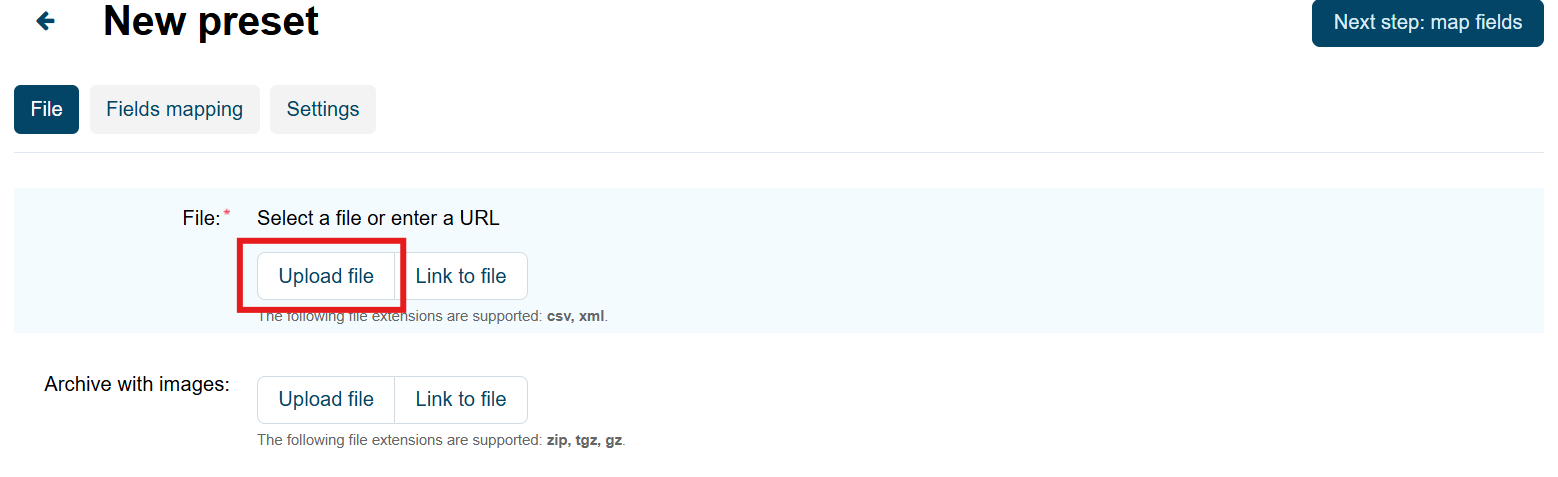
- Click “+” to add new preset.
- Click "Upload file" and select your prepared CSV file.
Match Fields (Field Mapping)
- Switch to the Fields Mapping tab.
- The system will prompt you to map columns from your file to seller panel fields.
- Ensure all necessary columns are correctly assigned.
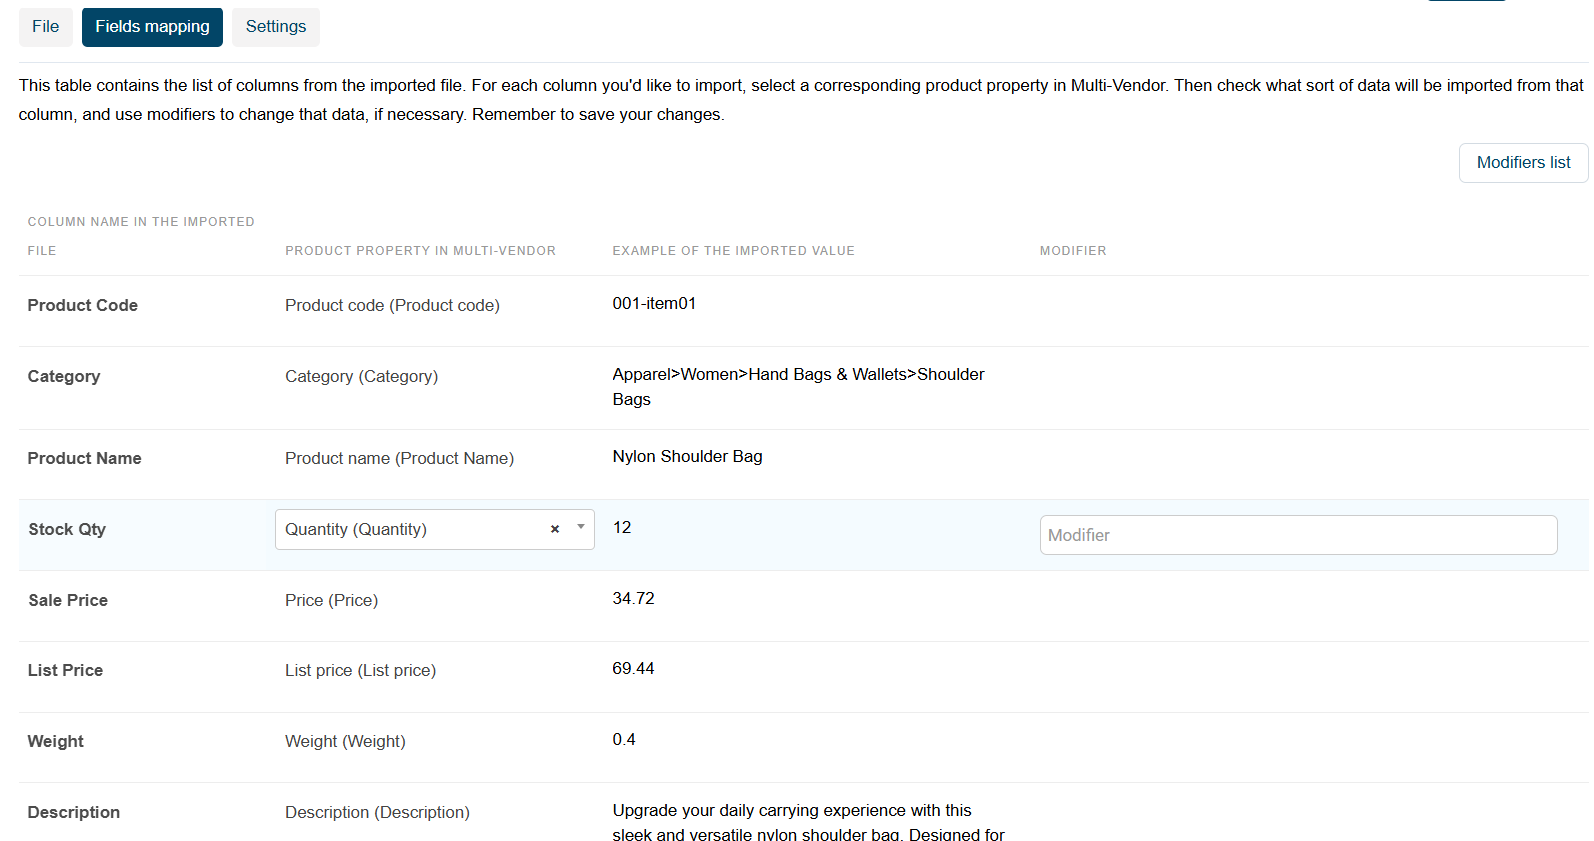
To learn more about field mapping, make sure to visit the CSV Sheet Field Mapping.
Set Import Settings
- Perform Test Import—enable this setting if you wish to import only the first five products.
- Choose options such as:
- Import all products from the file — New products will be created. Existing ones will be updated.
- Update existing products only — Only updates existing products; new ones are skipped.
- Create new products only — Skips existing products and imports only new ones.
- Additional Settings:
- Delete existing files of downloadable products — if you enable this setting, then importing downloadable products will delete their existing files. When the setting is disabled, importing a file of a downloadable product doesn’t replace the existing files, but rather adds it alongside them.
- Delete existing additional images — if you enable this setting, all additional images of a product will be replaced with the images listed in the csv file.
When the setting is disabled, importing additional images for a product doesn’t replace the existing additional images, but rather adds new images alongside the existing ones. - Delete existing attachments — if you enable this setting, then the existing attachments of the imported products will be replaced with the attachments listed in the csv file. If no attachments are specified, the old attachments will remain unchanged.
- Save and Click Import to start the process.
Check the Import Results
- Once the import is complete, review the success message.
- If any errors appear, view the error log and fix the issues.
- Re-upload the corrected CSV file if necessary.
Verify the Imported Products
- Go to Products to check the imported items.
- Ensure prices, descriptions, and images are correctly displayed.
Note: If any product from seller’s sheet is already present in “Products → Common Product for Sale” then it will be automatically active for sale.
If you have further questions or in case of any issue, contact us at Martmox.com.au